Quickstart
Get the full power of Salt by following this quick guide. Looking to set up the SDK? Visit the SDK guide first and then come back here.
- Connect and create an organisation
- Add collaborators
- Set up Robo Guardians
- Create accounts
- Set policies
Connect and Create Organisation
An Organisation on Salt holds Accounts and policies that are managed by Owners. Organisations can also have participants with other access levels.
Whoever sets up the Organisation will automatically be an Owner. You can add other Owners or Members during the initial set-up, or invite them later.
Using the SDK
Create an organisation using createOrganisation. You'll need to supply createOrganisationParams, which includes organisation name, the name you want to use for yourself in the Organisation, the role you want to be displayed next to your name. You also need to accept the Salt Terms of Use.
You'll also need to authenticate to Salt using your wallet client.
You can refer to the SDK docs for more information.
Add Collaborators
Your organisation will need at least two collaborators, including the originating Owner, to create Accounts and thus send transactions.
You'll need to provide a name and their external wallet address (such as MetaMask).
You'll also need to assign them a role:
- Owner: has control over the entire Organisation and Accounts they’ve set up
- Member: visibility across many areas of the organisation and can transact on Accounts they're signers on
- Agent: external entity that can be added as a co-signer onto an agent-managed account
Collaborator access levels are described in more detail in core concepts.
Using the SDK
Use an invitation to add a collaborator to your organisation: see SDK docs.
Set up Robo Guardians
You can set up an organisation's Robo Guardians by using AWS or your own infrastructure.
Use the API endpoint createRoboHostto start the process.
The Robo Guardians come online once you provision a host and its setup completes.
In the process of setting up your Robo Guardians, save the wallet-seed backup and treat it as a secret. If you need to recover accounts without Salt, this will provide the easiest recovery path.
Using your infrastructure
Use RoboHost.generateSetupScriptto create a script to set up self-hosted Robo Guardians unique to your organisation. You'll need the information referenced in the section above.
Using AWS
-
You’ll need an AWS account. You can create one beforehand, or during the setup process. You’ll need to provide payment details.
-
Use the endpoint
RoboHost.generateCloudFormationUrlto generate the script. Currently, only AWS Cloud Hosting is supported. -
You can read
userPublicKeyfrom your Salt instance, if you choose, but it will be prefilled in the script. The URL will also include a One-Time Password (OTP) - take note of it as you'll need to confirm it's correct at the end of the setup process. -
Go to AWS to set up the Robo Guardians.
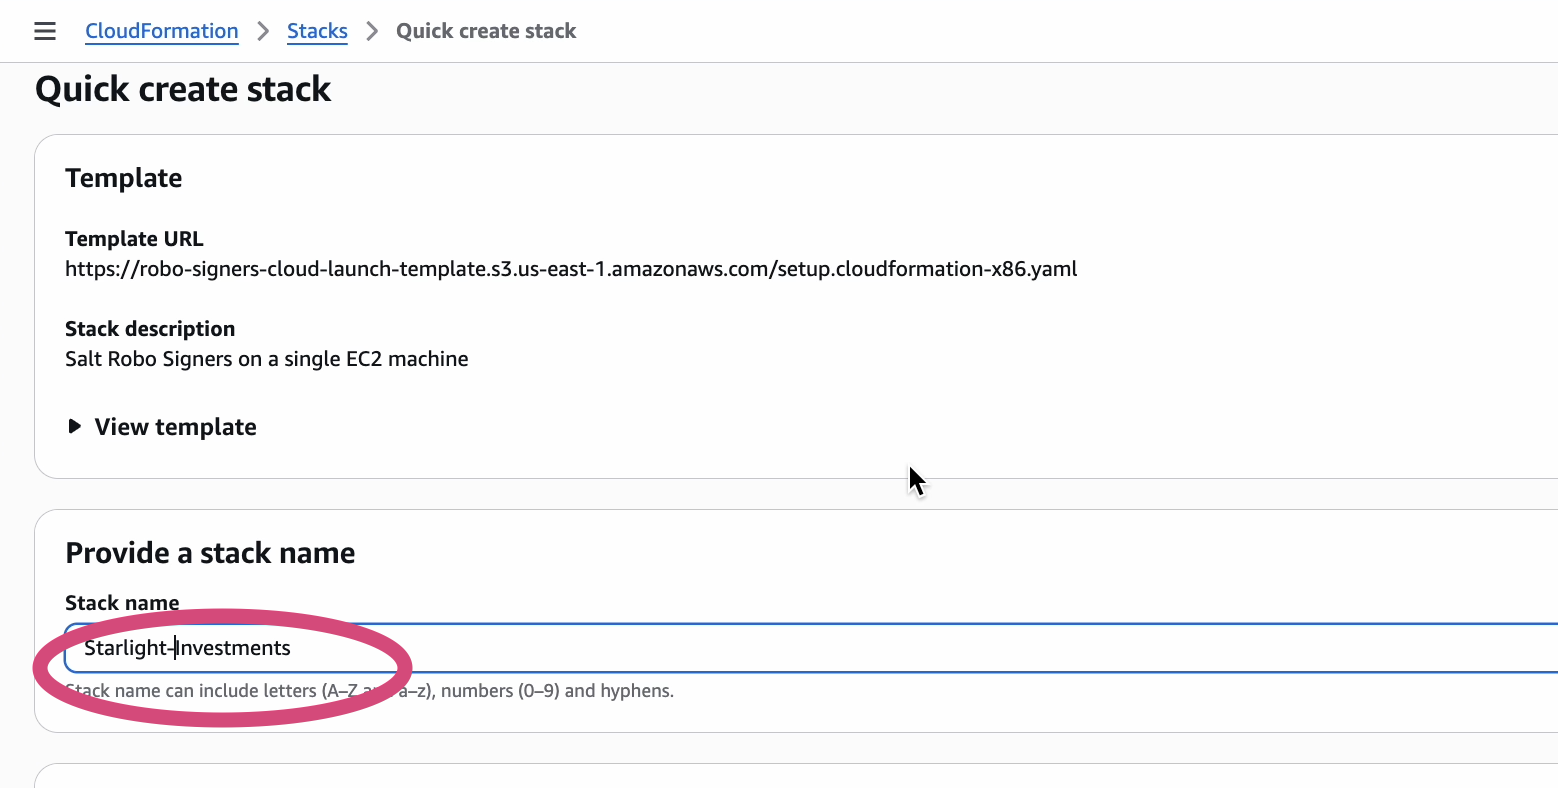
In AWS, create a name for your stack, or use the pre-filled name based on your Organisation name. If there’s a space in the name, delete or replace it.
-
This name will be visible as the name of your Robo Guardians container in Salt.
-
The rest of the stack’s configuration can be left as-is.
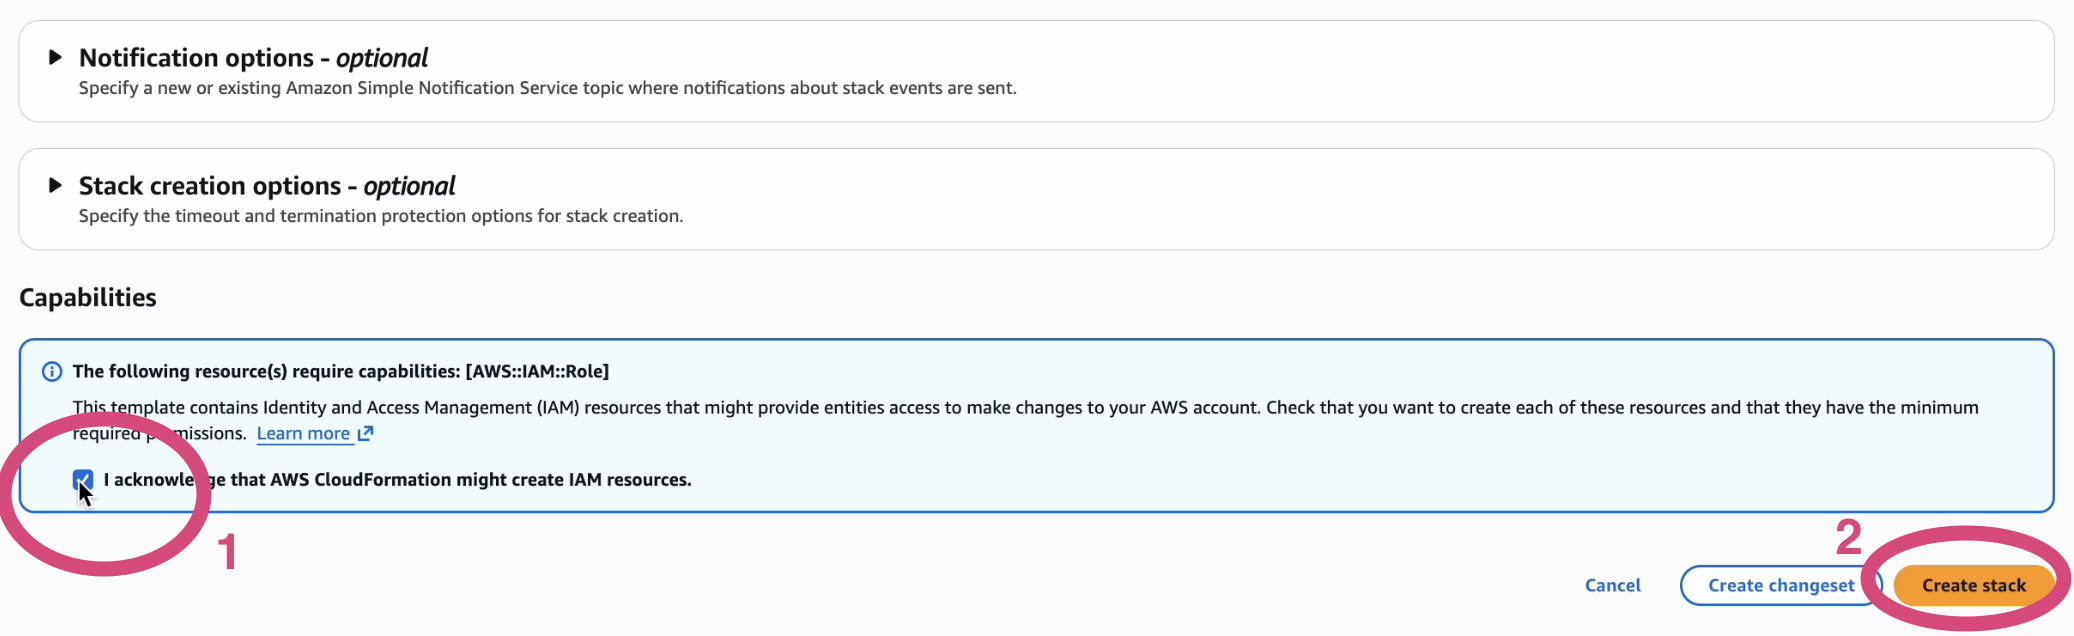
Click the box to acknowledge that AWS CloudFormation may create IAM resources.
Then, click Create Stack. The robo guardians may need a few minutes to be created.
-
Confirm that the One-Time Password matches the one you were given at the start of setup.
-
You can use an API endpoint to track the status of your Robo Guardian setup process. Once they are Online, they're ready. You can also check in on the status of your Robo Guardians in the future via this endpoint.
Create Accounts
Use the Acccount creation endpoint (createAccount) to begin. The best result will be to have your co-signer(s) online and available when you create the account.
Set Policies
Policies ensure that your Robo Guardians only sign on transactions that meet your organisation's risk management policies.
Setting up, editing and deleting policies is only available to Owners.
Using the SDK
Create a policy using createAccountPolicy: see SDK docs
Update a policy by:
- Getting an account's policy IDs using
getAccount: see SDK docs - Use the Policy ID with
updateAccountPolicy: see SDK docs